Welcome to the second OpenGL tutorial on SteinSOFT.net! I've decided to write about this topic because I thought it would be rather interesting and I have seen many people wanting to do something like that. So what is it indeed? It's simply a little integrated window in a normal dialog in which some OpenGL shapes are drawn. On the one side you have OpenGL and on the other standard Windows controls. If you can't imagine how this could look like, take a look at my project OpenGLDialog.
Let's quickly dive into this exciting topic;). There isn't much theory about which one could speak. That's good... It all begins with a new Mfc project. Create a new project using the Mfc application wizard. Choose the third option, a dialog-based application. In the following dialogs you can pratically disable/enable whatever you want; it doesn't matter in this case.
You should now have your little Mfc app ready. We will start with the most important thing of your project, the little OpenGL window in the corner.
The Integrated OpenGL Window
Okay you have your little OpenGL based project but.. what next? The fastest and easiest thing first;). That is to create our dialog in the dialog editor. When the project has been created, this should also be the first thing you see in MSDEV. How you arrange your little dialog is irrelevant, the only thing we have to do is to create a new static text field. This text field seems to be useless at first sight; it is indeed a template for our OpenGL window. The window will have the exactely the same size and position as this little static control. Later on if you wan t to change the window's positions or size, you won't need to change he code, but only this little texfield in the dialog editor.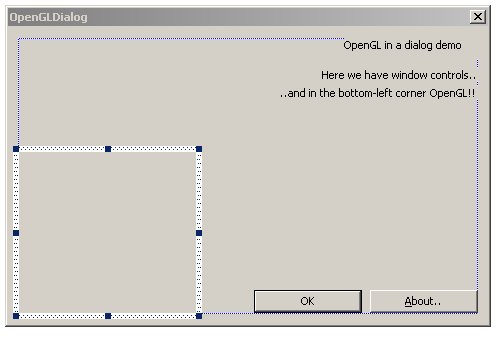 Here you see the dialog I created. It has only two little textfields and two buttons on the bottom. These are intended to show how the OpenGL window works together with the other standard Windows controls. The only important control is the text field on the bottom left. It has no text so it is actually invisible. Ok then add a text field to your dialog and place it where you want to have the OpenGL window later on in your application. The name is not important, but don't call it ID_STATIC as MSDEV does it by default. We could not get its position and size later on. I simply called it ID_OPENGL_WINDOW. It's the box I selected on the image on the left. Delete the caption the field has as default and make sure that it is marked as invisible (Under properties > Behaviour, uncheck the Visible property).
So after this easy step, we have our little dialog completeted and we can move on to coding. It will be more difficult.. but don't panic, it's still not too hard. What we have to do first, is to create a new class derived from CWnd. It will be then the little OpenGL window on the bottom. So then create a new class called COpenGLControl with CWnd as base class. Click on Insert | New Class... or something like this,
The next steps are the following: * Create the window * Create an OpenGL rendering context * Setup basic OGL things (viewport, state machine etc.)
Let the coding begin! The very first thing to do is to add the needed variables and objects to COpenGLControl. To create an OpenGL rendering context, I'll use OpenGLDevice from the code section. You could also use your own functions to set the pixelformat etc. but I I use this class because it's very easy ;-). The three variables are: OpenGLDevice openGLDevice (don't forget to include the header!), CClientDC* dc the window's device context and float rotation the rotation of the triangle we'll draw to this little window. Here is the code of the constructor and destructor:
COpenGLControl::COpenGLControl()
{
   dc = NULL;
   rotation = 0.0f;
}

COpenGLControl::~COpenGLControl()
{
   if (dc) //Only delete dc when really allocated
   {
      delete dc;
   }
}
The first step above are done easily. It is accomplished in Create(..) of COpenGLControl, the function we will create now. So add Create(CRect rect, CWnd* parent) to COpenGLControl. Here's the code:
void COpenGLControl::Create(CRect rect, CWnd *parent)
{
   //Register window class
   CString className = AfxRegisterWndClass(
      CS_HREDRAW | CS_VREDRAW | CS_OWNDC,
      NULL,
      (HBRUSH)GetStockObject(BLACK_BRUSH),
      NULL);

   //Finally create the window
   CreateEx(
      0,
      className,
      "OpenGL",
      WS_CHILD | WS_VISIBLE | WS_CLIPSIBLINGS | WS_CLIPCHILDREN,
      rect,
      parent,
      0);
}
In this function we will create the little OpenGL window and it will have exactely the same size as the rect specified by rect. Secondly it will be a child of parent which will be the main dialog later on. The next step is to create the OpenGL rendering context. This is done in the message handler for WM_CREATE. So add the handler for this message. Here's the code:
int COpenGLControl::OnCreate(LPCREATESTRUCT lpCreateStruct)
{
   if (CWnd::OnCreate(lpCreateStruct) == -1)
      return -1;

   dc = new CClientDC(this); //Get device context of window
   openGLDevice.create(dc->m_hDC); //Create opengl rendering context
   InitGL();

   //DONE
   return 0;
}
Next add the message handler for WM_SIZE in COpenGLControl. We'll set the OpenGL viewport in it. The code:
void COpenGLControl::OnSize(UINT nType, int cx, int cy)
{
   CWnd::OnSize(nType, cx, cy);

   if (cy == 0)
   {
      cy = 1;
   }

   glViewport(0,0,cx,cy);
   glMatrixMode(GL_PROJECTION);
   glLoadIdentity();

   glOrtho(-1.0f,1.0f,-1.0f,1.0f,1.0f,-1.0f);

   glMatrixMode(GL_MODELVIEW);
   glLoadIdentity();
}
Nothing special will be done here. The viewport will be set up as well as an orthogonal projection. It is similar to any other OpenGL application. The next function is InitGL(). It will be called when the windows is created and here is the best place to initialize some OpenGL things, like lighing or texture mapping. Add void InitGL() to COpenGLControl. Code:
void COpenGLControl::InitGL()
{
   glShadeModel(GL_SMOOTH);
   glClearColor(0.0f, 0.0f, 0.0f, 0.0f);
   glClearDepth(1.0f);
   glEnable(GL_DEPTH_TEST);
   glDepthFunc(GL_LEQUAL);
   glHint(GL_PERSPECTIVE_CORRECTION_HINT, GL_NICEST);
}
Very trivial code here. You should know what we do here or you are on a slightly wrong place here ;-). The next function is actually the function that draws finally something on the screen. It's void DrawGLScene():
void COpenGLControl::DrawGLScene()
{
   glClear(GL_COLOR_BUFFER_BIT | GL_DEPTH_BUFFER_BIT);
   glLoadIdentity();

   //***************************
   // DRAWING CODE
   //***************************

   //Rotate the triagle
   glRotatef(rotation,0.0f,1.0f,0.0f);

   glBegin(GL_TRIANGLES);
      glColor3f(1.0f,0.0f,0.0f);
      glVertex3f(1.0f,-1.0f,0.0f);
      glColor3f(0.0f,1.0f,0.0f);
      glVertex3f(-1.0f,-1.0f,0.0f);
      glColor3f(0.0f,0.0f,1.0f);
      glVertex3f(0.0f,1.0f,0.0f);
   glEnd();

   SwapBuffers(dc->m_hDC);
}
This function simply draws a colored triangle rotated by rotation degrees. It will be called in the next function. It's the message handler for WM_PAINT, the window message that is called everytime the window has to be refreshed. Add the handler to COpenGLControl and fill in the following code:
void COpenGLControl::OnPaint()
{
   rotation += 0.01f;

   if (rotation >= 360.0f)
   {
      rotation -= 360.0f;
   }

   /** OpenGL section **/

   openGLDevice.makeCurrent();

   DrawGLScene();

   CWnd::OnPaint();
}
First we update rotation so that our triangle is actually rotated and then we call DrawGLScene() that draws the little shape. What is very important is here is the call to openGLDevice.makeCurrent(). This function ensures the the right OpenGL device context is selected before drawing to the window. Like this it's possible to have more than one OpenGL control placed in a dialog.
The last and very important message handler WM_ERASEBKGND makes sure that the dialog message queue isn't overloaded - WM_ERASEBKGND is always sent to the window when it's background has to be erased. Add the handler to this message to COpenGLControl and in the following code:
BOOL COpenGLControl::OnEraseBkgnd(CDC* pDC)
{
   //we've erased it - at least we do so
   return TRUE;
}
That's all for COpenGLControl. The class itself is done. The next step is to update a little the parent class, the dialog. Ok then, get ready.
The Dialog Class
There isn't left much to do now, only some little coding and compared to the last exhausting and deadly difficult part, it is a real childplay.. First we add an instance of COpenGLControl to our dialog. Do this in the header file of your dialog class (I called it here COpenGLDialogDlg with COpenGLDialogDlg.h as header). Here's a code snippet://In COpenGLDialogDlg.h //.. //Very important #include "OpenGLControl.h" class COpenGLDialogDlg : public CDialog { //Other things.. //.. protected: //Our instance of COpenGLControl COpenGLControl openGLControl; //.. };
So our dialog class now knows the instance and we can move on to final step. This is done in OnInitDialog() of COpenGLDialogDlg which should be implemented automatically by the Mfc wizard. Here we initialize our little OpenGL window and tell it where it is positioned. The last code snippet for today.. here:
BOOL COpenGLDialogDlg::OnInitDialog()
{
   CDialog::OnInitDialog();

   //.. OTHER THINGS ARE DONE ..
   SetIcon(m_hIcon, TRUE);
   SetIcon(m_hIcon, FALSE);

   // TODO

   //Get Size and position of the template textfield we created
   //before in the dialog editor
   CRect rect;
   GetDlgItem(IDC_OPENGL_WINDOW)->GetWindowRect(rect);

   //Convert screen coordinates to client coordinates
   ScreenToClient(rect);
   //Create the OpenGL window using the size and set this dialog as parent
   openGLControl.Create(rect,this);

   return TRUE;
}
That's it! In this little code snippet you see why the previously created textfield is useful: we get its window-rect, its size and position on the screen, and call COpenGLControl::Create(..) with it as parameter. GetDlgItem(IDC_OPENGL_WINDOW) returns a pointer of CWnd to this control, IDC_OPENGL_WINDOW. If you remember we gave the little textfield template a name and with it we can refer to it and get info about without creating a new instance.
Now everything's done! Compile the project and you'll have a little OpenGL window integrated in your normal dialog. The good thing is that you don't have to change the code anymore if you want to move or resize the OpenGL window. Simply do it in the dialog editor with the textfield template. You could now extend this program. You could use this base code to create an interactive info box for one of your projects with a dynamic logo drawn with OpenGL. There so many things possible.
If you have further questions or comments or you had some problems then simply mail me or ask your questions in the message board. I'll try to answer them. Happy Coding and see you in the next tutorial!
Downloads:
OpenGLDialog source code (VC++)